Quick start
Contents
Installation
Get any supported Linux distribution. And install EVA ICS v4 with the default settings plus HMI service.
Execute all commands in this tutorial under the super-user (root). By default, EVA ICS starts the node core as root, however privileges of services are dropped to restricted users after being launched.
sudo -s
curl https://pub.bma.ai/eva4/install | sh /dev/stdin -a --hmi
The above command prepares the system, installs all EVA ICS components (default distribution, eva-shell) on a single machine to “/opt/eva4” directory and automatically deploys basic services.
Additionally, Python is installed and the virtual environment is created at /opt/eva4/venv. Python is required for eva-shell and some other services.
“eva” command is automatically added into the system path with the symbolic link in /usr/local/bin.
Node system dashboard, Operation centre and other vendored UI applications are available at the URL:
http://localhost:7727/va/
The task
Consider a temperature sensor and a fan, both of which are Modbus-connected to the local serial port. We intend to:
Monitor state of both and control the fan using the UI.
When the temperature reaches 25 degrees Celsius, turn on the fan.
When the temperature reaches 22 degrees Celsius (3 degrees Celsius hysteresis), turn off the fan.
Normally, the above logic is controlled by a PLC, whilst SCADA software simply collects, monitors, and controls its registers; however, in this example, we are offloading it to the application side.
Commons
In EVA ICS the node core is responsible only for data brokering with very minimal logic, all functionality is provided by services (see Platform architecture).
There are two ways configuring the node:
creating/deploying items, services and other resources one-by-one.
deploy everything with a single deployment file from a local or remote node.
In this tutorial, we are going to create elements one-by-one, while at the end the full deployment file will be provided as well.
The elements can be created either with eva-shell or with direct bus calls to the node core, using “/opt/eva4/sbin/bus” command-line utility. In this example we are using eva shell only.
Connecting the equipment
Creating items
Note
If item auto-creation is enabled in eva/config/core (default from EVA ICS 4.0.2 build 2023112001), this step can be omitted as all the items are auto-created by the fieldbus connection controller service.
Create the items. There following two types of items are required: unit (can be controlled) and sensor (can be monitored only).
It is preferred to use eva-shell in the interactive mode (run “eva” without arguments) to get auto-completion and other features, but in this tutorial we are sending commands one-by-one directly from the system shell.
eva item create sensor:room1/temp
eva item create unit:room1/fan
There is no extra configuration required for the sensor, but unit actions must be mapped to a service. Edit the unit:
eva item edit unit:room1/fan
and modify its configuration to the following:
enabled: true
oid: unit:room1/fan
action:
  svc: eva.controller.modbus1
Both created items can receive state updates from any service, while the unit action is mapped to the service eva.controller.modbus1.
EVA ICS items have two state registers: status (i16) and value (Any). The status -1 means that the item is in error-state.
Let us read the item states:
eva item state \*
unit:room1/fan and sensor:room1/temp have status=1 (OK), both have null in the value register.
Fieldbus connection
Modbus master controller is one of the default services, so it is already installed on the machine.
Let us create its instance from the template and call it eva.controller.modbus1:
eva svc create eva.controller.modbus1 \
    /opt/eva4/share/svc-tpl/svc-tpl-controller-modbus.yml
When executed, the configuration editor is automatically opened.
Consider the fan control relay is at Modbus unit 0x01 and is controlled by coil #0 and the temperature sensor is at Modbus unit 0x02 and its value is stored in holding registers h0-h1 as IEEE 754a 32-bit float.
Modbus is at /dev/ttyS0 (system RS-232 port #1), communicated with RTU serial protocol.
Modify the configuration to the following, more info in the configuration comments:
- id: eva.controller.modbus1
  params:
    bus:
      path: var/bus.ipc # the default local node event bus
    # service command, absolute or relative to EVA_DIR
    command: svc/eva-controller-modbus
    config:
      modbus:
        path: /dev/ttyS0:9600:8:N:1
        protocol: rtu
      # there are no batch-read commands in Modbus for mixed registers, so
      # data is always pulled in blocks and parsed after
      pull:
      # the first block: modbus unit 1, register C0, pulling the single register
      - count: 1
        reg: c0
        unit: 1
        map:
        # block mapping: coil at the offset 0 is mapped to unit:room1/fan value
        - offset: 0
          oid: unit:room1/fan
      # the second block: modbus unit 2, register H0, pulling 2 registers
      - count: 2
        reg: h0
        unit: 2
        map:
        # block mapping: real (32-bit IEEE 754 float) at offset 0
        # is mapped to sensor:room1/temp value (no prop field is required)
        - offset: 0
          oid: sensor:room1/temp
          type: real
      # do not send events to the core for 3600 seconds if the state is not modified
      pull_cache_sec: 3600
      # pull both Modbus units every 200ms
      pull_interval: 0.2
      # action mapping: when there is an action on unit:room1/fan called,
      # set C0 at Modbus unit 1 to the requested value
      #
      # if the action is completed, the item unit:room1/fan gets its new value during
      # the next pull cycle
      action_map:
        unit:room1/fan:
          reg: c0
          unit: 1
      # queue size for unit actions
      action_queue_size: 32
      # verify (read back) the Modbus register after it was modified during the action
      actions_verify: true
      # the service will panic if Modbus connection is not available (e.g.
      # serial port error)
      panic_in: 0
      # bus events queue size
      queue_size: 32768
      # if any operation fails - perform N retry attempts
      retries: 2
    # the service supports react-to-fail mode. This means on critical
    # errors it is started in the fail mode and sets status of ALL items,
    # mapped in "pull" sections to -1 (error)
    react_to_fail: true
    timeout:
      # for fieldbus services, set startup timeout a little higher than the
      # core timeout (default: 5 sec) to give them a time to connect to the
      # fieldbus and perform initial tasks
      startup: 10.0
    user: eva # for RTU, make sure the system user has access to /dev/ttyS0
    workers: 1
Check the service status:
eva svc list
If any problems occur, check the logs in /opt/eva4/log or execute:
eva log get -y
Consider, everything is okay, check the sensor state:
eva item state sensor:*
Check the unit state:
eva item state unit:*
Turn on / off the fan manually, “-w 5” means wait 5 seconds for the action finish, otherwise obtain its uuid and keep running in the background:
eva action toggle unit:room1/fan -w 5
Check the fan (visually and the unit state)
eva item state unit:*
Defining logic
As already mentioned, real-life plants usually have logic tasks performed by fieldbus PLCs. However, in our example the logic is offloaded to the application layer.
Rules
EVA ICS v4 provides the default service Logic manager, which can handle basic logic tasks, such as rules, cycles and scheduled jobs.
Let us create a service instance and define required logic rules:
eva svc create eva.controller.lm1 \
    /opt/eva4/share/svc-tpl/svc-tpl-controller-lm.yml
- id: eva.controller.lm.room1
  params:
    command: svc/eva-controller-lm
    bus:
      path: var/bus.ipc
    config:
      rules:
        - id: ROOM1_TEMP_ABOVE
          oid: sensor:room1/temp
          prop: value
          # matches if sensor:room1/temp value > 25
          condition:
            min: 25
          run: lmacro:room1/room1.fan_control
          args:
            - 1
        - id: ROOM1_TEMP_BELOW
          oid: sensor:room1/temp
          prop: value
          # matches if sensor:room1/temp value < 22
          condition:
            max: 22
          run: lmacro:room1/room1.fan_control
          args:
            - 0
    user: nobody # no privileged user required
Check the service status:
eva svc list
Logic macros
What does “run” field mean? It tells the controller to run a lmacro when a rule condition matches. Logic macros are similar to PLC programs, which are executed either cyclically or on events. The primary difference is that lmacro can be written in any supported programming language and physically hosted on any EVA ICS node in the cloud. Some lmacro scenarios can be embedded in custom services as well.
Deploying lmacro controller
We are going to write a simple Python logic macro, which will be handled by Python macros controller. This service is not included in the default EVA ICS distribution as requires Python plus additional modules. Let us install it first:
/opt/eva4/sbin/venvmgr add eva4-controller-py
Create a service instance with the default configuration:
eva svc create eva.controller.py \
         /opt/eva4/share/svc-tpl/svc-tpl-controller-py.yml
- id: eva.controller.py
  params:
        command: venv/bin/eva4-svc-controller-py
        bus:
          path: var/bus.ipc
        config: {}
        user: nobody
Check the service status:
eva svc list
Create logic macro
Before dropping privileges to “nobody” the service automatically creates the folder (default) /opt/eva4/runtime/xc/py (/opt/eva4/runtime/xc is symlinked as /opt/eva4/xc) where Python scenarios must be put.
The scenarios can be edited with eva-shell as well. When edited with eva shell, the scenario is also automatically checked for syntax errors.
Python macros controller looks for scenario files using lmacro id, not group+id, so let us create the file called room1.fan_control.py:
eva edit xc/py/room1.fan_control.py
if _1 == 0:
        stop('unit:room1/fan')
elif _1 == 1:
        start('unit:room1/fan')
The “_1” variable contains the first non-keyword argument, sent by the logic manager.
The node core does not know yet that the lmacro lmacro:room1/room1.fan_control is handled by eva.controller.py service. Let us create it and assign action:
eva item create lmacro:room1/room1.fan_control
eva item edit lmacro:room1/room1.fan_control
enabled: true
oid: lmacro:room1/room1.fan_control
action:
  svc: eva.controller.py
Now everything is mapped correctly. Check the lmacro, by manually running it:
eva action run lmacro:room1/room1.fan_control -a 1 -w 5
eva item state unit # the fan must be ON
eva action run lmacro:room1/room1.fan_control -a 0 -w 5
eva item state unit # the fan must be OFF
That is it. When the sensor temperature is changed, the scenario is executed automatically. Both unit and lmacro action results can be obtained at any time with the command:
eva action list
Building Human-Machine Interface
Interfaces and combined HTTP API for 3rd-party applications in EVA ICS v4 can be provided by the default HMI service.
Creating users and ACLs
As we launched the installer with “--hmi” argument, the HMI service, as well as required authentication services were deployed automatically.
By default, EVA ICS creates “operator” ACL and “operator” user, but let us create a new ACL, a new user and use them instead:
eva acl create op
eva acl edit op
id: op
read:
  items:
  - '#'
  pvt:
  - '#'
  rpvt:
  - '#'
write:
  items:
  - '#'
eva user create op # set the password to 123
eva user edit op
Set the user’s ACL to op.
acls:
- op
login: op
# sha256-hashed
# to generate: "echo -n 123 | sha256sum"
password: a665a45920422f9d417e4867efdc4fb8a04a1f3fff1fa07e998e86f7f7a27ae3
Warning
SHA256-hashes for deployed passwords should be used in test configurations only. See AAA Deployment.
Creating a web-HMI application
Note
If a dedicated HMI is not required, consider using Operation centre vendored application, which allows to perform typical operator tasks, including custom dashboard creation.
While developing, turn on HMI service development mode to allow CORS:
eva svc edit eva.hmi.default
# set config/development field to true
Let us use Vite, Vanilla JS (TypeScript) and EVA ICS WebEngine:
npx --yes create-vite myhmi --template vanilla-ts
cd myhmi
npm install
npm install --save @eva-ics/webengine
Put the application config into public/config.json to switch EVA ICS WebEngine between development environment and production (consider EVA ICS is running on the local host, otherwise correct the API URI):
{
  "api_uri": "http://localhost:7727",
  "debug": true
}
As HMI service hosts applications at /ui URI, put the following into vite.config.js in the top folder of the project:
import { defineConfig } from "vite";

export default defineConfig({
    base: "",
});
Create a slider button (example: https://www.w3schools.com/howto/howto_css_switch.asp) by creating src/slider.css:
.switch { position: relative; display: inline-block; width: 60px;
  height: 24px; }
.switch input { opacity: 0; width: 0; height: 0; }
.slider { position: absolute; cursor: pointer; top: 0; left: 0; right: 0;
  bottom: 0; background-color: #ccc; -webkit-transition: .4s; transition: .4s; }
.slider:before { position: absolute; content: ""; height: 16px; width: 26px;
  left: 4px; bottom: 4px; background-color: white; -webkit-transition: .4s;
  transition: .4s; }
input:checked + .slider { background-color: #2196F3; }
input:focus + .slider { box-shadow: 0 0 1px #2196F3; }
input:checked + .slider:before { -webkit-transform: translateX(26px);
  -ms-transform: translateX(26px); transform: translateX(26px); }
Modify src/main.ts as the following:
import "./style.css";
import "./slider.css";
import { Eva, disableTabFreeze } from "@eva-ics/webengine";
disableTabFreeze();
const eva = new Eva();
eva.set_login_password("operator", "secret");
eva.watch("sensor:room1/temp", (state) => {
document.getElementById("temp")!.innerHTML = state.value;
});
eva.watch("unit:room1/fan", (state) => {
const fan = document.getElementById("fan") as HTMLInputElement;
fan.disabled = (state.act as number) > 0; // disable when action is running
fan.checked = state.value > 0;
});
const log = eva.log;
eva.load_config().then(() => {
eva.start();
show_hmi();
});
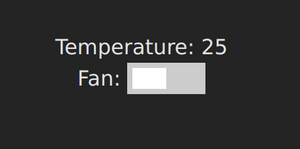
const show_hmi = () => {
document.querySelector<HTMLDivElement>("#app")!.innerHTML = `
<div>Temperature: <span id="temp"></span></div>
<div>Fan: <label class="switch"><input type="checkbox" id="fan"><span class="slider"></span></label></div>
`;
document.getElementById("fan")!.onchange = (e) => {
e.preventDefault();
eva.action.toggle("unit:room1/fan").catch((err) => {
log.error(`fan toggle error: ${err}`);
});
};
};
Note that after calling fan actions, the HMI app does not need to update the button value. The value is updated in real-time by “eva.watch” as soon as the server reports a new state.
Run the test server and check your application:
vite --open
Put the application into HMI service:
vite build
echo "{}" > ./dist/config.json
cp -rf ./dist/* /opt/eva4/ui/
Open HMI and test: http://localhost:7727
That is all. After understanding this simple example, read other sections of EVA ICS documentation to discover the real power of this mighty open-source Industry-4.0 automation platform. Good luck!
The same but with deployment
The above example is good for small or test setups. However, large setups require IaC approach. Let us repeat everything with a single deployment file.
Note
Certain sections of the deployment file can be exported from a live system, using “eva item export”, “eva acl export”, “eva svc export” and related commands.
Make a fresh install and append additional services:
sudo -s
curl https://pub.bma.ai/eva4/install | sh /dev/stdin -a --hmi
/opt/eva4/sbin/venvmgr add eva4-controller-py
# allow deployment for UI files
ln -sf /opt/eva4/ui /opt/eva4/runtime/ui
Create a tarball of your Creating a web-HMI application:
cd dist
echo "{}" > ./config.json
tar czf hmi-app.tgz *
Create a deployment file (correct the path to web-HMI application tarball):
version: 4
content:
  # ".local" is the alias for the local node
  # the deployment can be peformed on any managed node in the cloud
  # (if admin_key_id is set for the node in the replication service)
  - node: .local
    items:
      - oid: sensor:room1/temp
      - oid: unit:room1/fan
        action:
          svc: eva.controller.modbus1
      - oid: lmacro:room1/room1.fan_control
        action:
          svc: eva.controller.py
    svcs:
      - id: eva.controller.modbus1
        params:
          bus:
            path: var/bus.ipc # the default local node event bus
          command: svc/eva-controller-modbus
          config:
            modbus:
              path: /dev/ttyS0:9600:8:N:1
              protocol: rtu
            pull:
            - count: 1
              reg: c0
              unit: 1
              map:
              - offset: 0
                oid: unit:room1/fan
                prop: status
            - count: 2
              reg: h0
              unit: 2
              map:
              - offset: 0
                oid: sensor:room1/temp
                type: real
            pull_cache_sec: 3600
            pull_interval: 0.2
            action_map:
              unit:room1/fan:
                status:
                  reg: c0
                  unit: 1
            action_queue_size: 32
            actions_verify: true
            panic_in: 0
            queue_size: 32768
            retries: 2
          react_to_fail: true
          timeout:
            startup: 10.0
          user: eva
          workers: 1
      - id: eva.controller.lm.room1
        params:
          command: svc/eva-controller-lm
          bus:
            path: var/bus.ipc
          config:
            rules:
              - id: ROOM1_TEMP_ABOVE
                oid: sensor:room1/temp
                prop: value
                condition:
                  min: 25
                run: lmacro:room1/room1.fan_control
                args:
                  - 1
              - id: ROOM1_TEMP_BELOW
                oid: sensor:room1/temp
                prop: value
                condition:
                  max: 22
                run: lmacro:room1/room1.fan_control
                args:
                  - 0
          user: nobody
      - id: eva.controller.py
        params:
              command: venv/bin/eva4-svc-controller-py
              bus:
                path: var/bus.ipc
              config: {}
              user: nobody
    acls:
      - id: op
        read:
          items:
          - '#'
          pvt:
          - '#'
          rpvt:
          - '#'
        write:
          items:
          - '#'
    users:
      - login: op
        password: a665a45920422f9d417e4867efdc4fb8a04a1f3fff1fa07e998e86f7f7a27ae3
        acls:
          - op
    upload:
        # correct the path to tarball
      - src: path/to/hmi-app.tgz
        target: ui/
        extract: true
      - text: |
          if _1 == 0: stop('unit:room1/fan')
          elif _1 == 1: start('unit:room1/fan')
        target: xc/py/room1.fan_control.py
and deploy it:
eva cloud deploy path/to/deploy.yml
# or with eva-cloud-manager directly
/opt/eva4/bin/eva-cloud-manager cloud deploy path/to/deploy.yml